We’ve all been there, planting eight tomato plants “just in case,” getting attached to them, and by August, you’ve got San Marzanos coming out of your ears. What a wonderful problem to have! If you’ve found yourself with a little too much homegrown produce from your Victory Garden this year, here are five ways to preserve fresh fruit and vegetables—along with a few tips for keeping the best possible texture, flavour, and nutritional value from your crops!
Freeze It!
Thank goodness for the humble freezer bag. If you’re short on time and long on veggies, sometimes the easiest thing to do is pack them into the freezer until you’re ready to use them. Most vegetables do very well when frozen, keeping all the same nutrients they had when they were first picked. If you want to go the frozen route, here are some tips for freezing fresh vegetables (and fruit, if you’re so inclined!).
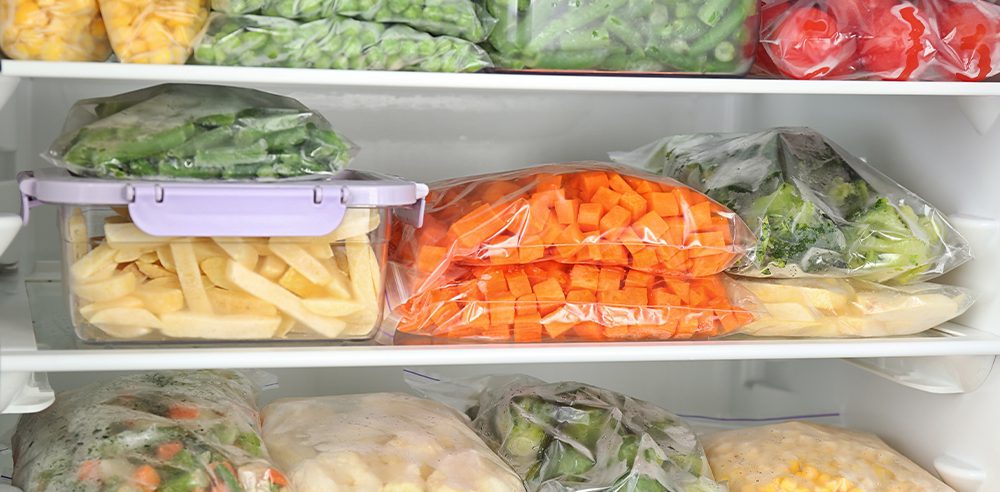
- Prep your veggies before you start the freezing process. Cut them so that, when you use them down the road, you can simply throw them into the pan or pot without a fuss. Remove corn from the cob, dice your carrots and celery, slice your zucchini into nice medallions…you get the picture.
- Blanche your fruit and vegetables before packing them in freezer bags. For blanching, you’ll need a very large pot of boiling water and a large clean bowl or sink full of ice water. Working with batches of one type of veggie or fruit at a time, boil a batch for 1-2 minutes before removing it with tongs or a strainer and immediately plunge the batch into ice water. This prepares the food for freezing while maintaining as much nutritional content and flavour as possible.
- Some veggies, like spinach, are okay to freeze in a block right after harvesting. (Think of the packages of frozen spinach you can buy at the store!) However, for a lot of what you’ll be freezing, you probably won’t want to use it all at once. These veggies will need some time to freeze apart before they go into bags; otherwise, your frozen summer harvest will come out in one big chunk! To do this, lay the blanched veggies in a single layer on a cookie sheet and let them freeze for an hour or so before transferring them to bags.
- If you plan to continue growing veggies for years to come, I recommend investing in a chest freezer. You’ll have so much more room to store your produce and other bulky frozen foods!
- Once your veggies are frozen, they’re normally good to use for up to 18 months.
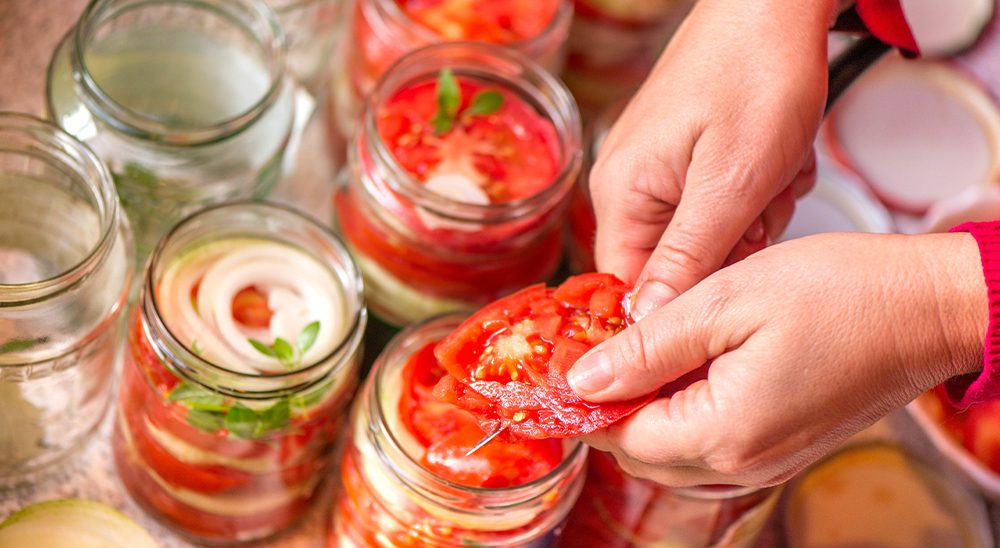
Can It!
If you’re the type who loves making soups, sauces, and chillies, canning is a lot of fun. It’s a little more work than freezing, but you’ll feel like a bonafide Martha Stewart every time you grab a jar of tomatoes you grew and canned yourself. Here are a few canning tips to get you started:
- The most important part of canning is preventing nasty bacteria from ruining your fun. Sterile jars and lids are non-negotiable. Make sure the cans and lids you choose can seal tightly.
- You’ll get the best results if you can your veggies within three hours of harvesting.
- The best way to protect your veggies from foodborne bacteria is to use a pressure canner for your canning. There are other homespun methods online, but the pressure canner is by far the safest.
- There are two methods of canning vegetables; hot packing and raw packing. Hot packed vegetables are pre-cooked and canned while still hot, while raw packed veggies are pre-washed and packed directly in cans before hot water is poured over them.
- If you hot pack, the vegetables will be the same size going into the can as they will be when they come out. Pack them at an appropriate density so that you can open the can and finish the contents within a week or so.
- If you raw pack, remember that most vegetables will shrink from sitting in the liquid. Pack them a little more densely to account for the eventual loss in volume.
- Once you’ve canned (according to the instructions on your pressure canner, of course!), make sure you hear the “ping” from each can lid as they seal. The golden rule is “no ping, no good.” If a jar doesn’t seal, it won’t keep—use those veggies up right away!
- Otherwise, properly-canned veggies should last at least a year.

Pickle It!
Fancy a culinary project? Pickling is a lot like canning, but with a twist. Pickling involves canning your produce with a brine, which is usually a mixture of salt, vinegar, and water. If you’re pickling for the first time, all of the above tips apply, as do the following:
- Consider your choice of salt—they’re not all created equal! Table salt from the shaker will usually result in cloudy-looking brine (not always so appetizing). Your best bet is to use canning salt, also known as pickling salt. Find it at the grocery store where the seasonings are; it’s cheap!
- Likewise, the vinegar you choose makes a big difference in the colour and flavour of your pickles. Cider vinegar is more mellow, but a bit more colourful, white vinegar will give a clearer brine but a sharper taste. Whichever vinegar you use, make sure it’s at least 5% acid. Vinegars display their acid percentage on the label.
- While salt and vinegar are the two “must-haves” in your brine, you can (and should!) get creative and customize your pickles! Try adding herbs, like fresh dill, to your pickles for some added flavour. You can also add any seasoning you like, or use multiple vegetables to create tasty combinations.
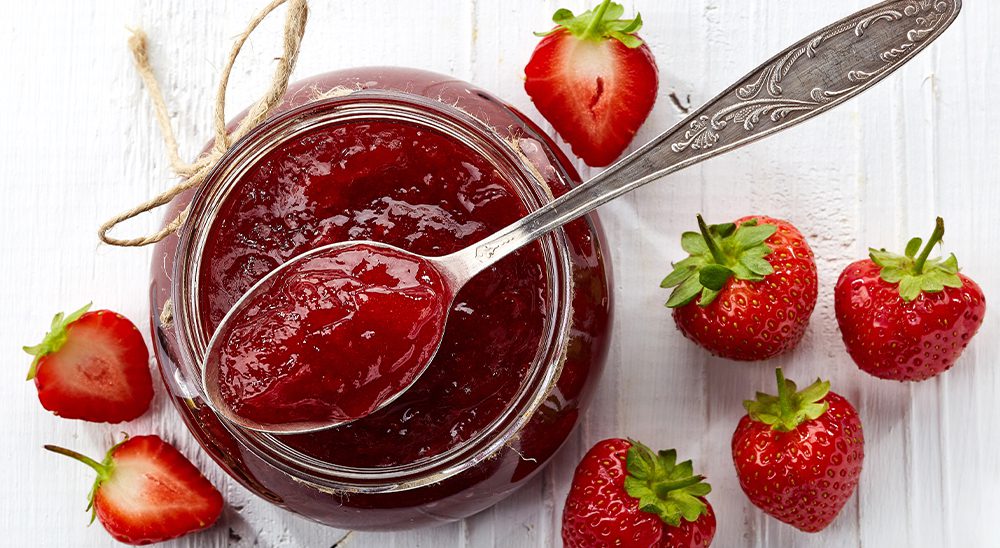
Preserve It!
By “preserve it,” I mean in the form of a sweet spread like preserves, jam, jelly, marmalade, or apple butter. If you have a fruit tree or berry shrub in your yard, this might become an annual tradition for you. I know tons of people who make jam every summer to give away for Christmas, and who doesn’t love a jar of homemade jam? Here are a few tips for the novice jam-makers:
- Fruit quality matters! Fruit that is slightly underripe, with no bruises, spots, or mould, makes the best jam. This is when the fruit is freshest, and pectin levels are at their highest, leaving you with tastier, thicker results.
- Make your preserves in batches. Boiling down too much fruit at once will cause it to cook unevenly.
- Use preserving sugar for the best texture. Granulated sugar will work, but preserving sugar dissolves better and aids in thickening.
- Use the frozen plate method for testing viscosity. When the jam is boiling, you can’t get an accurate read on how well the final product will set—you can only determine that when the jam is cool. Put a plate in the freezer a few hours before you get started, and when you’re ready to test the jam, spoon a little on the plate. The jam will cool instantly, and you’ll be able to preview how thick your final product will be. If the jam runs off the plate, it needs more time on the heat.
- As with all canning projects, cleanliness is paramount! Sterile jars and cans and proper heat processing with a pressure canner are your best bets.
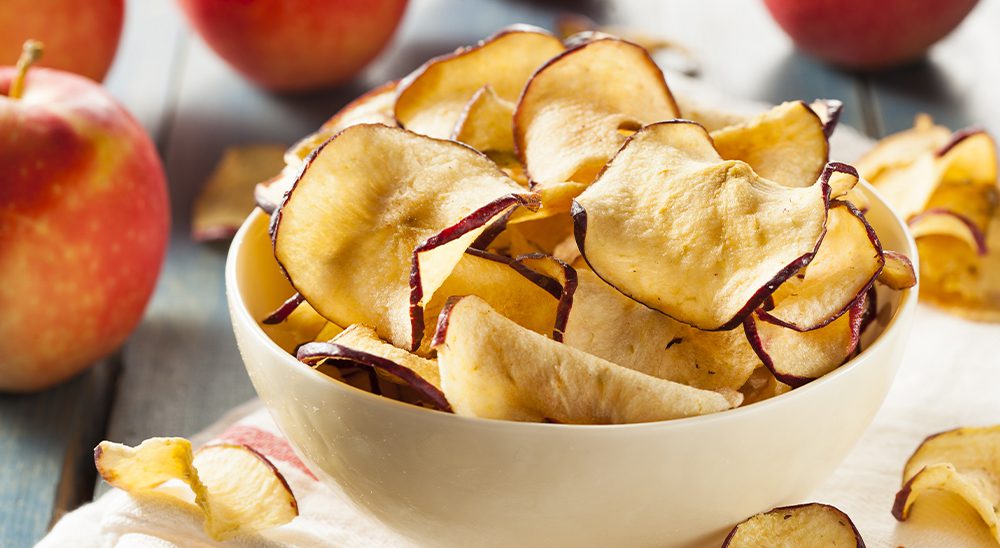
Dry It!
In some cases, drying is a great way to preserve your harvest. Drying requires the use of a food dehydrator, which can be a pretty long process. However, if you love apple chips or you’d like to preserve your fresh herbs, it’s a fun and interesting project to get into. Here are a few dehydrating tips:
- Always use firm, just-ripe produce for dehydrating. Overripe, soft fruits or vegetables have more moisture content and won’t dry as easily.
- If your fruit or veggie has a tendency to turn brown when exposed to air, like apples or potatoes, soak or spray them with lemon juice before dehydrating. It’ll keep a nicer colour without affecting the flavour.
- Use raw produce when dehydrating—trust me on this one.
- Experiment with small batches of foods you wouldn’t expect to enjoy in “chip” form. You’ll be amazed at how many fruits and veggies can transform into satisfying snack foods with a little time in the dehydrator!
Finally, I’ll leave you with this tip, which applies to any preservation method: enjoy it! You worked hard to produce this harvest, and it’s yours to use however you want. Get creative, try new things, and don’t be afraid to make a few mistakes—there’s always next year!

