

Orchids, often hailed as the aristocrats of the plant world, bring an air of sophistication to any window sill and indoor space. However, their reputation for being finicky can make us shy away from cultivating these very elegant blooms. Not to worry, with a little guidance, we can transform your living space into any orchid haven.
1. Pick Low Maintenance Orchids
Start with orchids that like being indoors. Look for the Phalaenopsis (Moth Orchid) or Natural epiphytes. Moth Orchids grow on tree trunks and in branches in their native habitat, they are the superheroes of easy care, once you balance their need for humidity, light and temperature.
2. Let there be Light!
Orchids love light but don’t want it too bright, especially in the summer. During the winter months direct to bright light will encourage growth and in the summer, your orchid will love bright even light. Put them by a window where the sun isn’t too harsh. If the sun shines directly on the leaves all day, the leaves will burn. If you don’t have a bright spot, no worries! Some orchids are cool with lover light.
3. Keep Things Comfy
Orchids like the same temperatures we do. Keep them in a cozy room, and they’ll be happy. No need for fancy gadgets to control the temperature!
4. Watering Made Easy
Don’t drown your orchid! Let the soil get a bit dry before giving them a drink and be consistent. Easy peasy! Orchids prefer to have their roots dunked for a few minutes and then let sit to dry. Too much water around the stem will cause their crowns to rot. Don’t worry too much if you forget – it’s better to be underwater than it is to overwater.

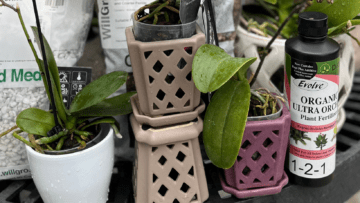
5. Use an Orchid Specific Soil
Orchid roots require lots of air. As an epiphyte, they will pull moisture out of the air around them, without too much effort. A good orchid soil is soi-less (contains no soil) and contains chunks of bark that will keep airspaces open in the media so the orchid roots can do their thing. Using a proper orchid pot will help too! Orchid pots have slots or holes in the sides of the pot to encourage airflow, so your orchid won’t get soggy feet.
6. Feed Them Every Now and Then
Orchids get hungry, too! Pick up some Orchid fertilizer by Evolve, the next time you are in the garden center. Specifically formulated for hungry orchids, the best time to fertilize is during the active growing season. Mix with water (just like making lemonade), and fertilize according to package directions. Easy, right?
7. A bit of Minor Pruning
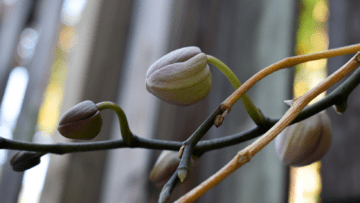
If your orchid’s flowers or leaves start looking tired, just snip them off. It keeps things looking neat and helps your plant focus on new growth. Orchids naturally produce air roots out of the top of the pot. These structures can be silver, green or even beige in colour and pull water out of the air for the plant. Leave the healthy roots, but remove any dead roots that are dark brown or mushy.
8. Check for Unwanted Visitors
Regularly check your plant for signs of insects or disease. Orchids do not normally have problems, however, they can be prone to leaf spot, scale or mealy bug. Inspect your plant and if you see something, take a photo and bring it into the garden center – we can help you identify what is going on and find a solution that is both plant and people friendly.
Taking care of orchids don’t have to be a puzzle. With the right care and attention, orchids are a rewarding addition to your indoor oasis. With some consistency around humidity, light, water, temperature and fertilizing you are good to go! Orchids are for everyone, and with these easy steps, you’ll have beautiful blooms in no time. If you have questions, want more advice and the right products, come and see us at Royal City Nursery – we love to help!
Happy Orchid Growing!